


This Blog includes all-in-one Jenkins from Basics to Advance. Right from installation of Jenkins to Deploying the Application on AWS instance.
Note: The context in the images are highlighted by Purple colour, please zoom-in to the pic for better resoultion. Happy Reading !!!
Installation of Jenkins
To install Jenkins first, we need to install Java firstly and then go ahead with Jenkins. So to install copy the below code or any other revelant or update from this link Jenkins .
sudo apt update
sudo apt install fontconfig openjdk-17-jre
java -version
openjdk version "17.0.8" 2023-07-18
OpenJDK Runtime Environment (build 17.0.8+7-Debian-1deb12u1)
OpenJDK 64-Bit Server VM (build 17.0.8+7-Debian-1deb12u1, mixed mode, sharing)
Check version with this command : java --version
Then install Jenkins through here
sudo wget -O /usr/share/keyrings/jenkins-keyring.asc \
  https://pkg.jenkins.io/debian-stable/jenkins.io-2023.key
echo deb [signed-by=/usr/share/keyrings/jenkins-keyring.asc] \
  https://pkg.jenkins.io/debian-stable binary/ | sudo tee \
  /etc/apt/sources.list.d/jenkins.list > /dev/null
sudo apt-get update
sudo apt-get install jenkins
Or install the updated through this Jenkins and check the version through the same command jenkins --version

To unlock Jenkins type this in your cli :
sudo cat /var/lib/jenkins/secrets/initialAdminPassword
Install all the required plugins.
Login with details, create the username and password.
💡Dont choose Skip and continue as admin as while you restart jenkins after plugins installations at some point you do need username passoword so add your login details.
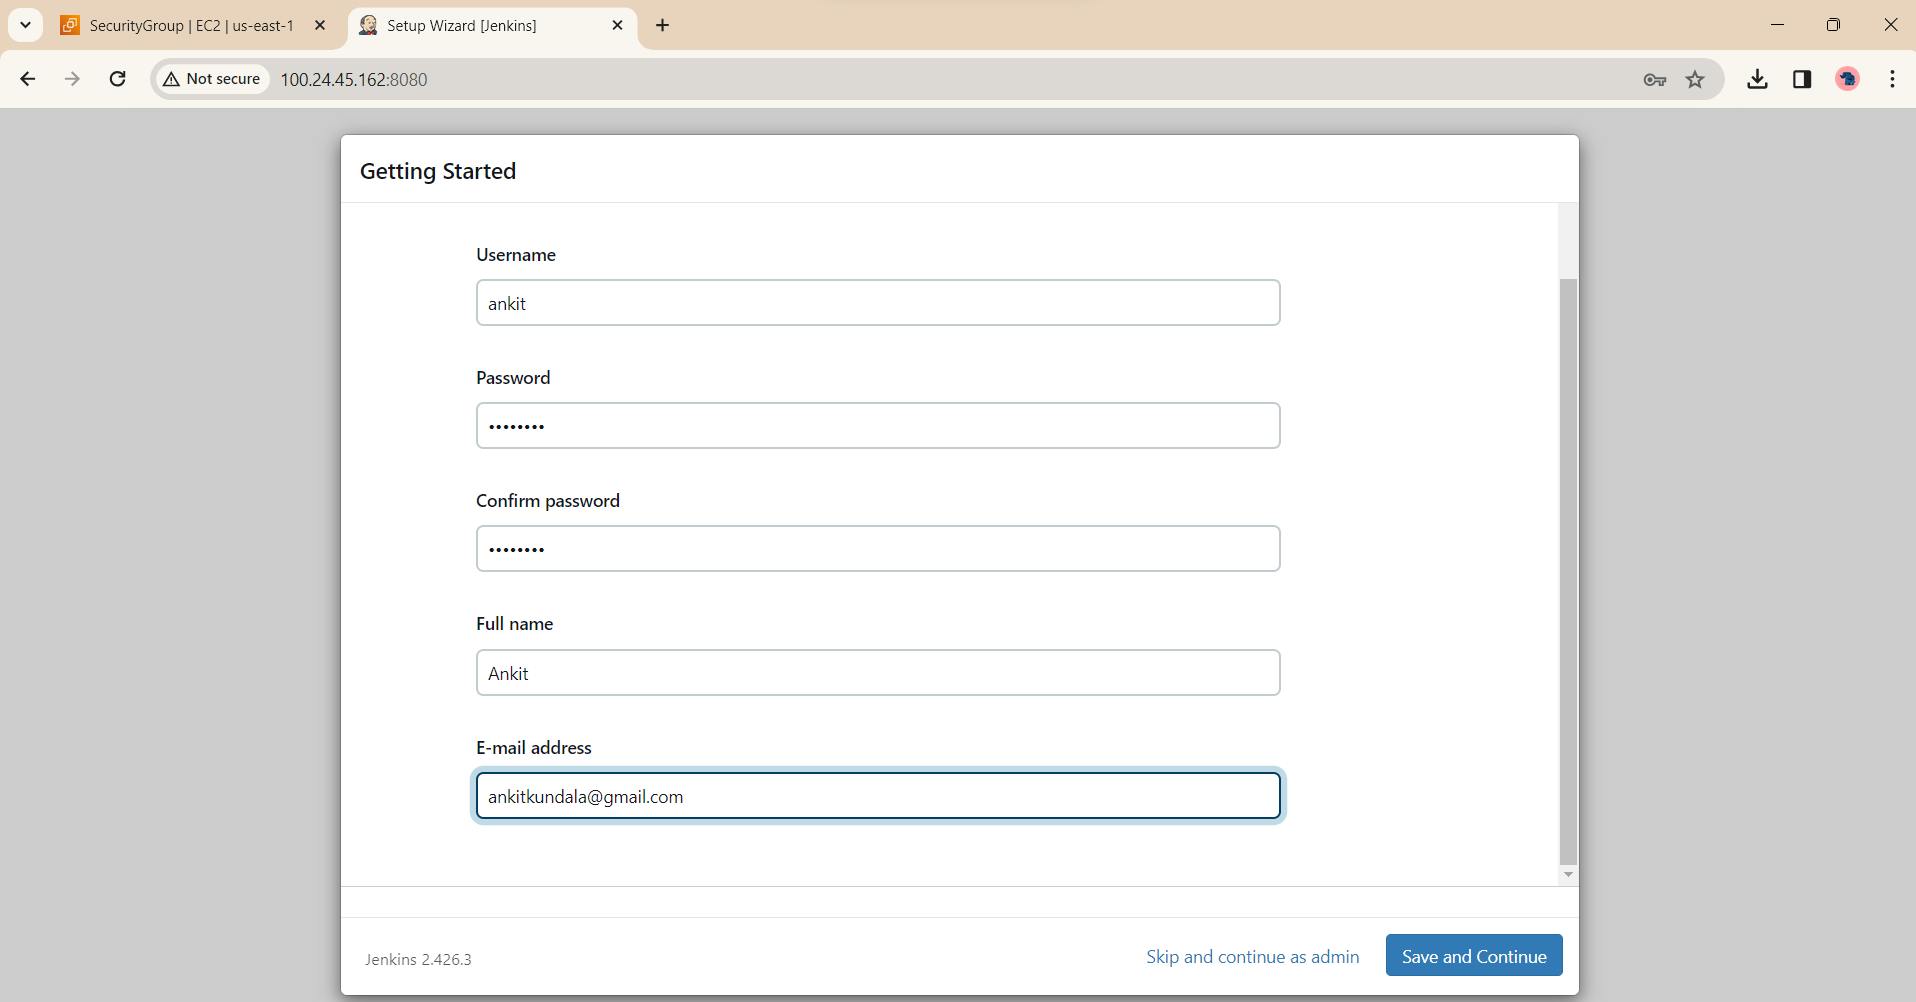
After this youre good to go and the installation of Jenkins is successfull.
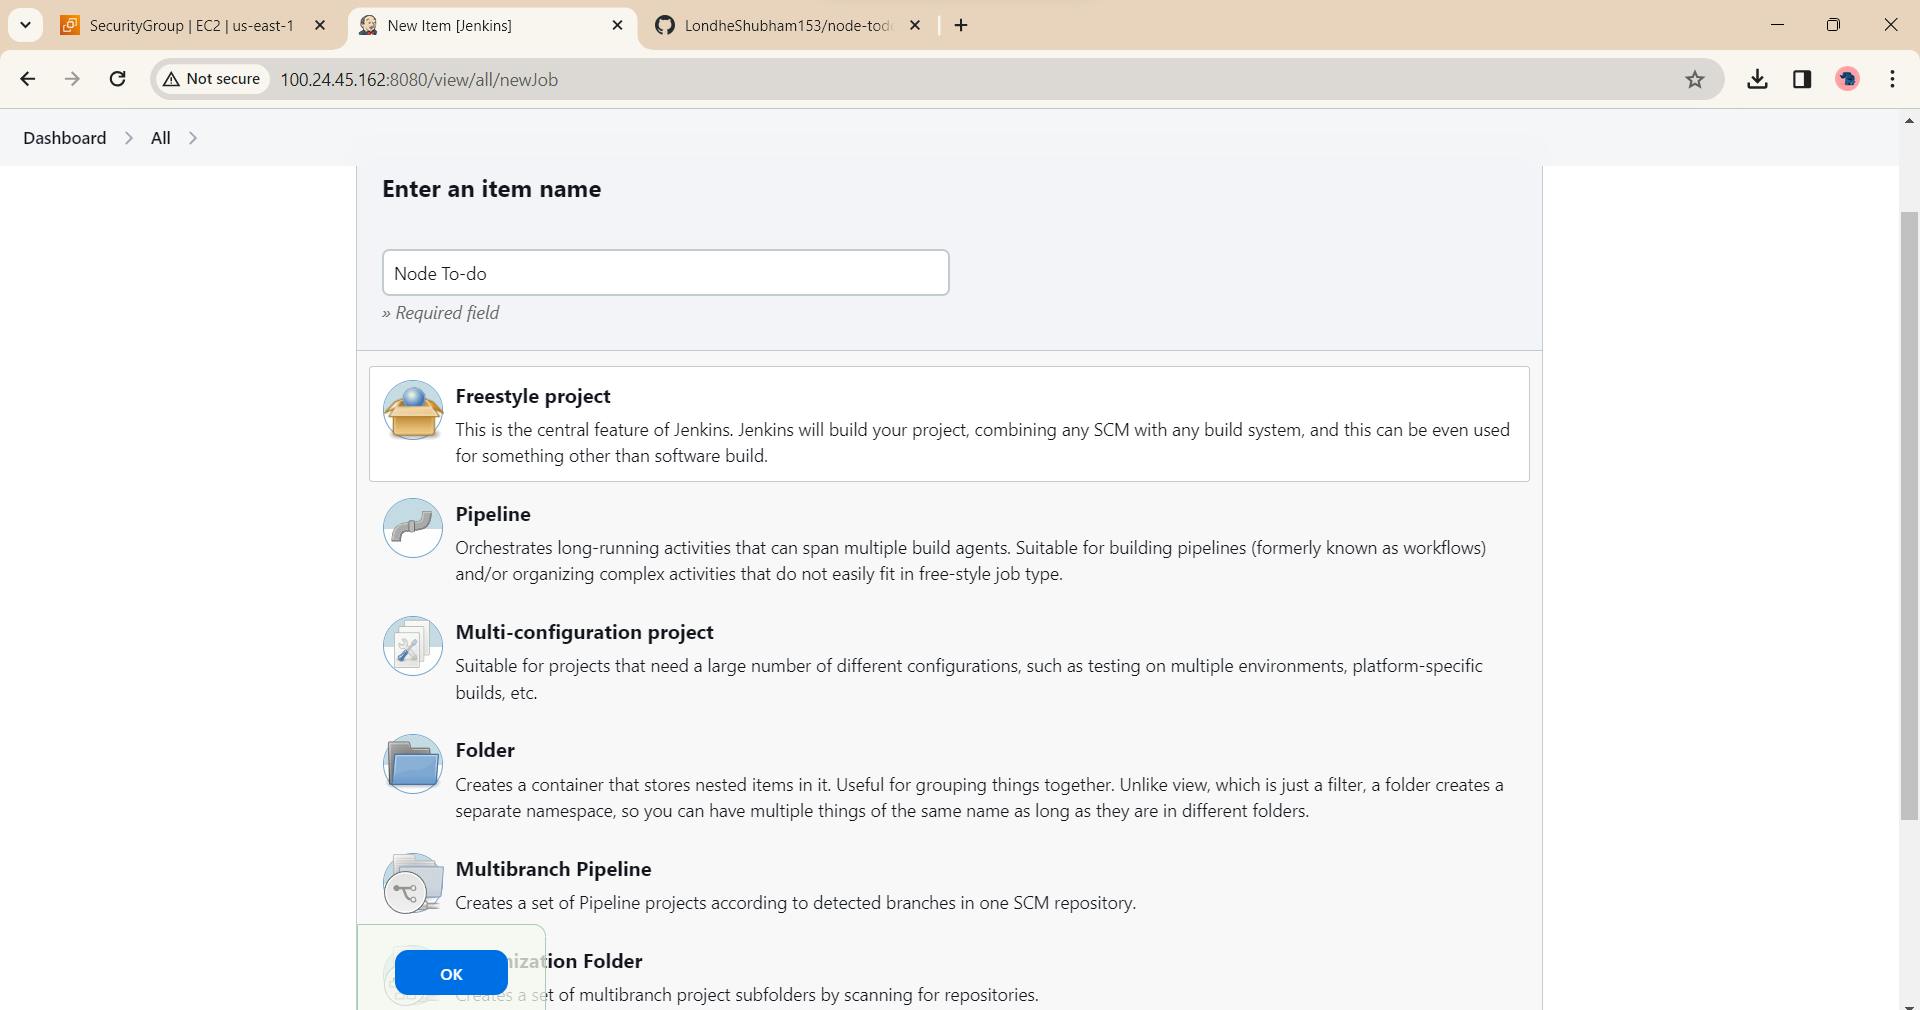
FreeStyle Project 🚀
Lets pick a name for the Project as Node To-do and select Freestyle Project.
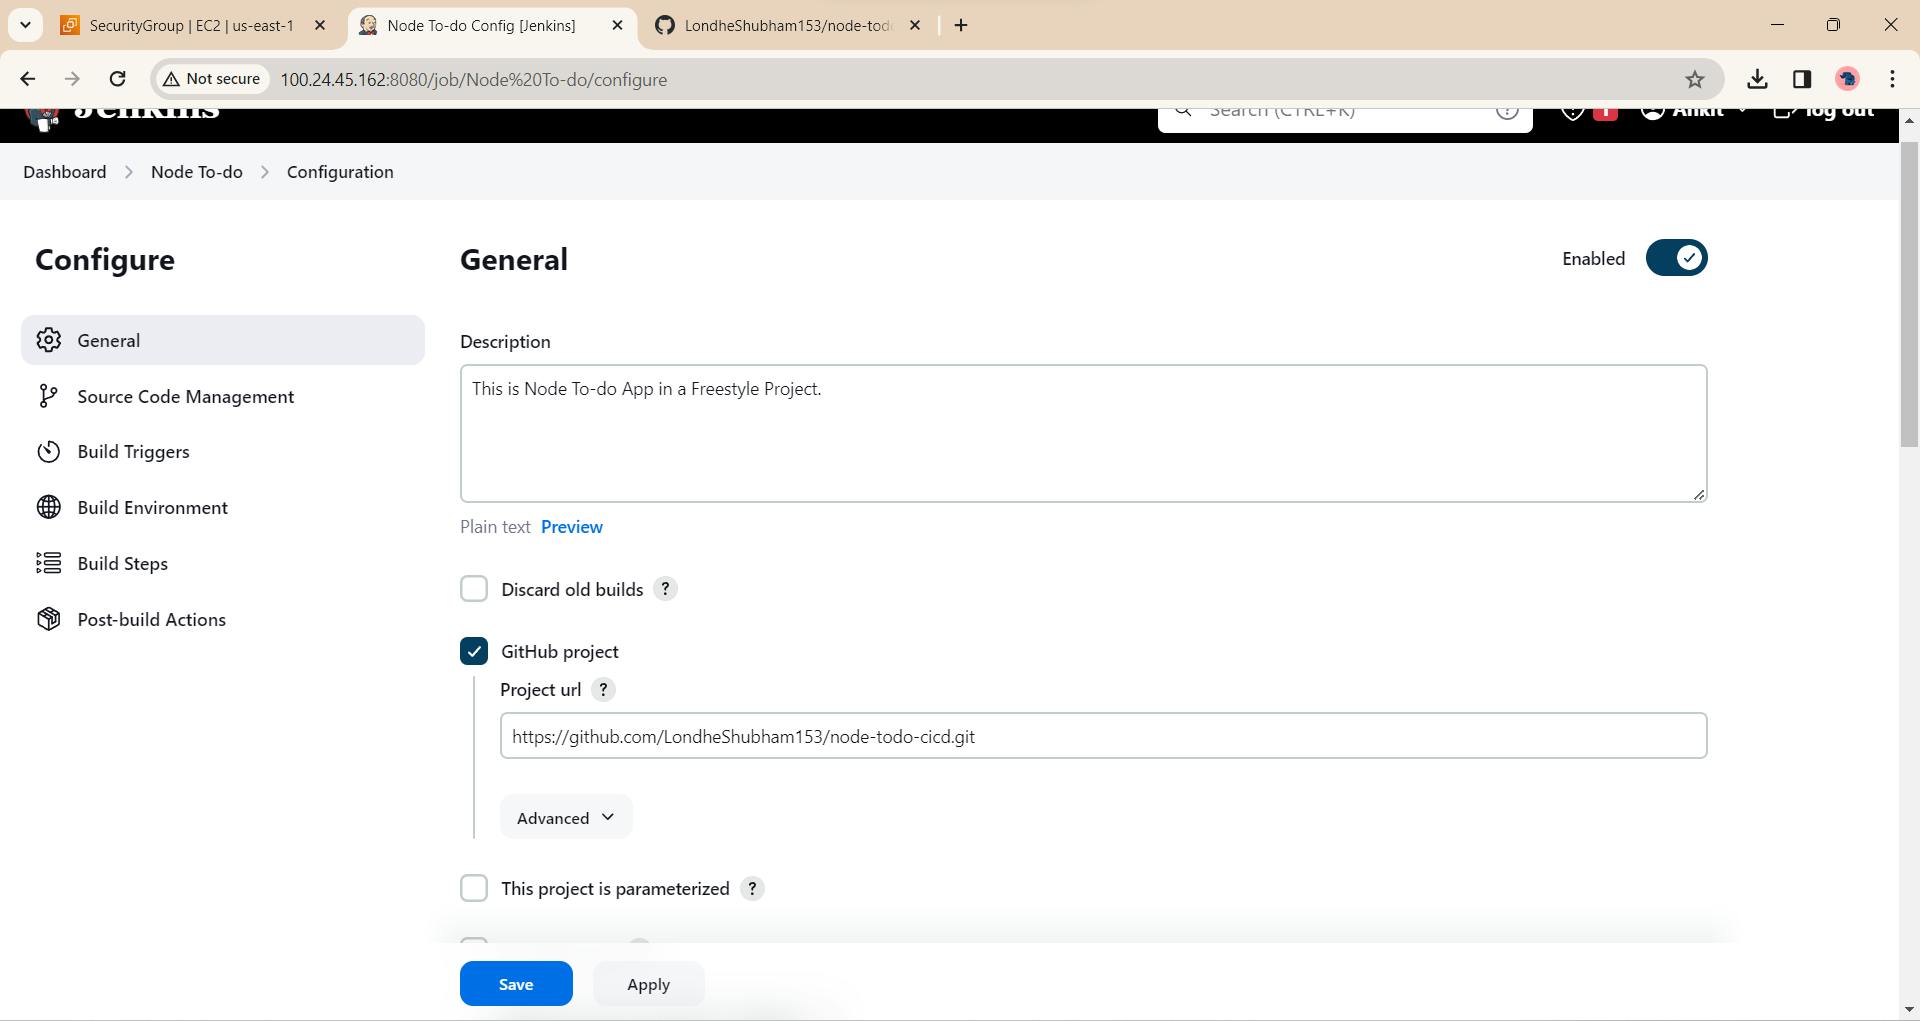
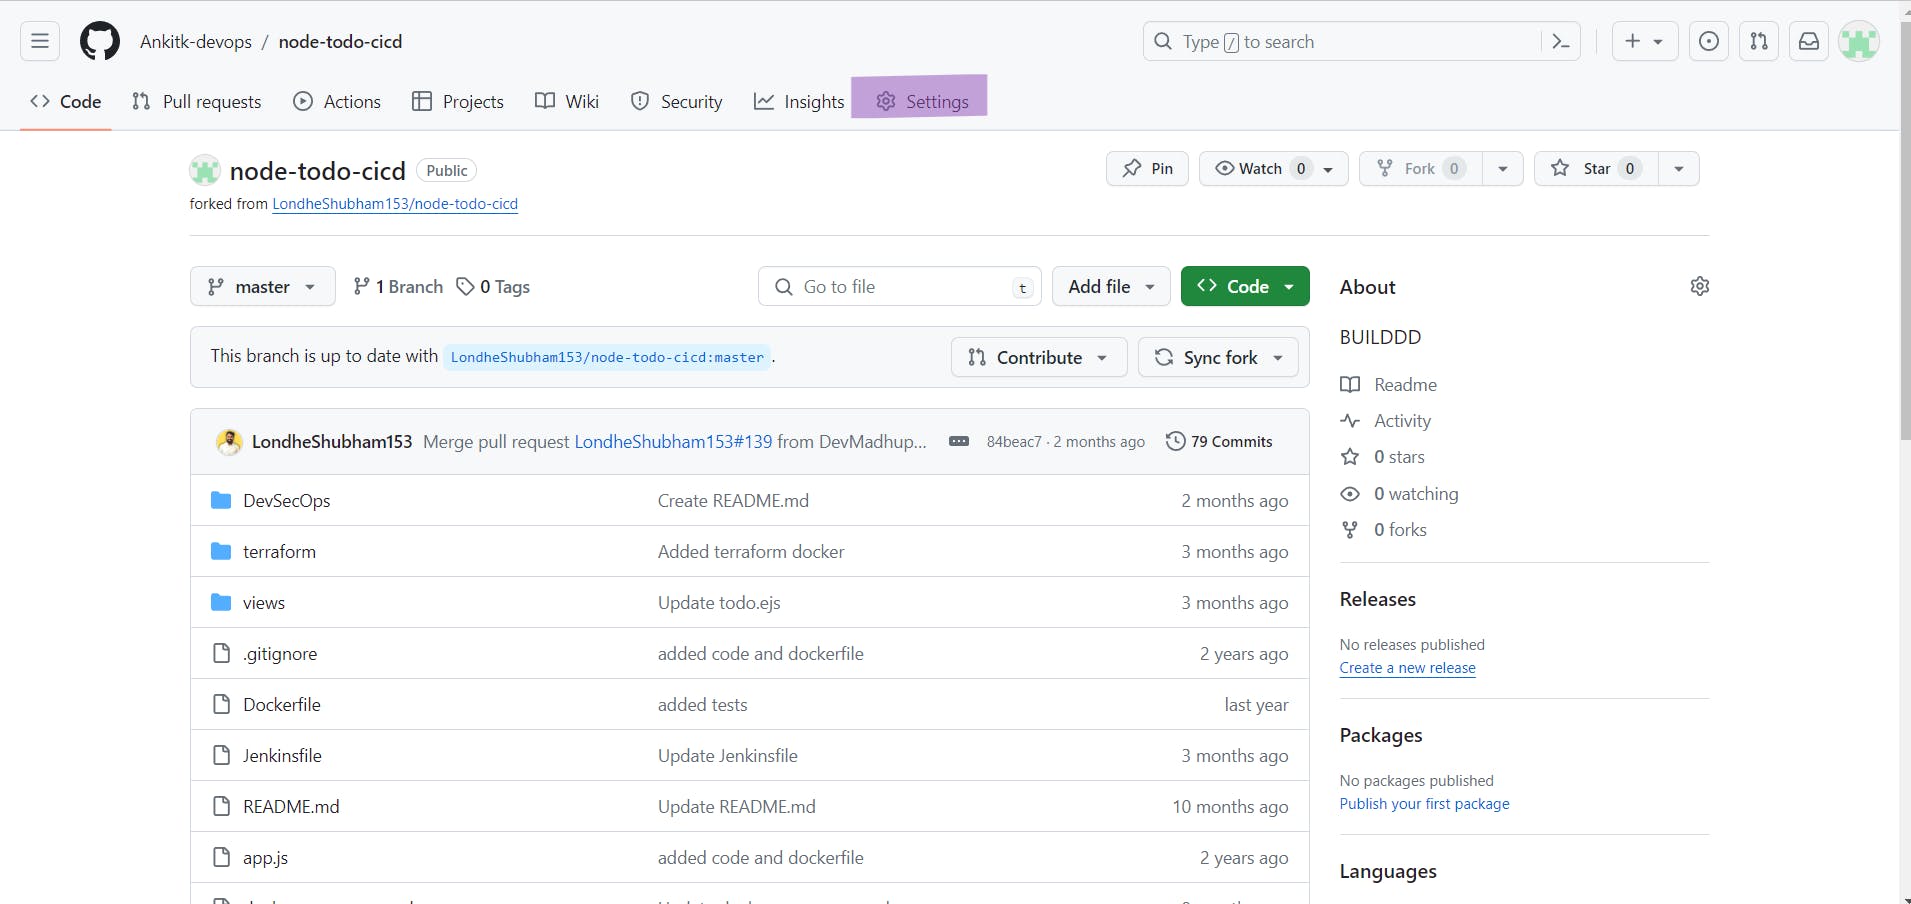
Add description and provide Github url of the actual project.
In the execute Shell :
docker-compose down
docker-compose up -d --no-deps --build web
echo "Built Successfully !"
After that install dokcer and docker-compose through cli
sudo apt update
sudo apt installdocker.io-y
sudo apt installdocker-compose -y
Check if properly installed through the commands docker-compose --version,
docker-compose --version
Open the port 8000 for the App to run.
Port Opening
EC2 > Security Groups > Click on the security group > Edit inbound rules
Open the port 8000 for the App to run & port 8080 for Jenkins. Click on Apply changes/Save Changes.

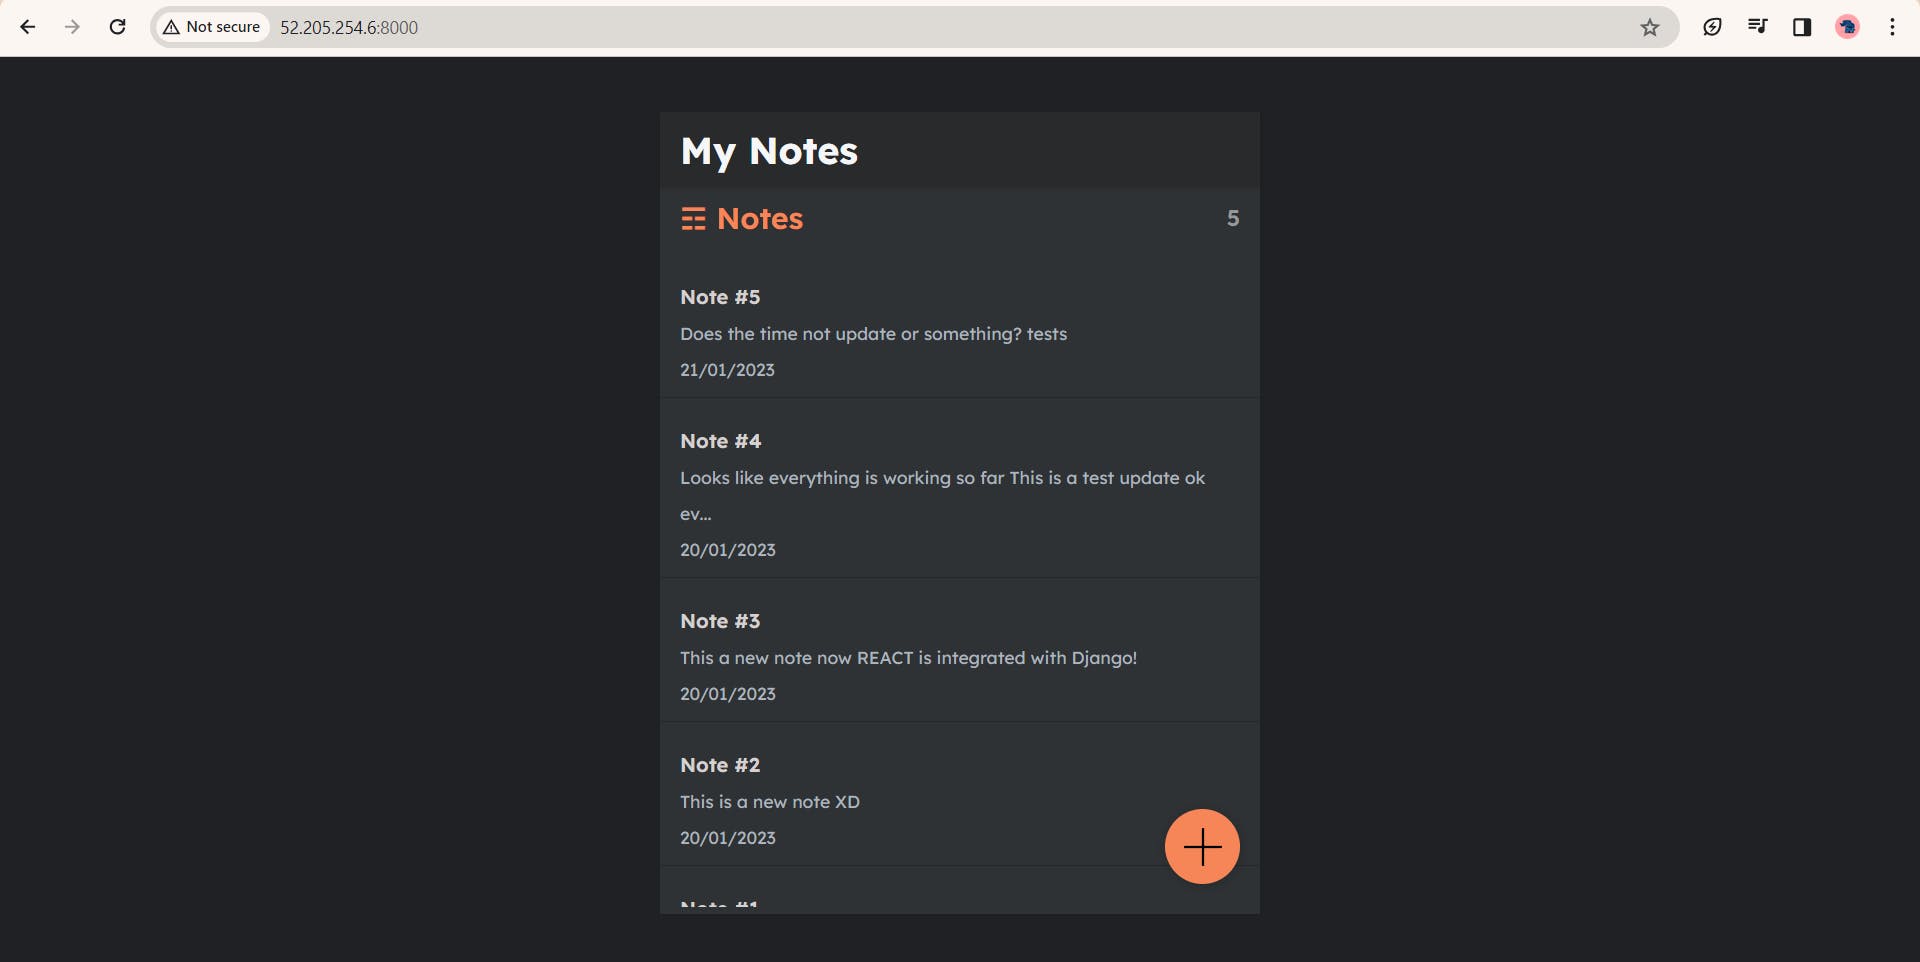
To Check the status of App, copy the public ip of the instance and add the port number that is mentioned in docker-compose.yaml file ie 8000 and searcch . You'll be able to see the App running on that port .
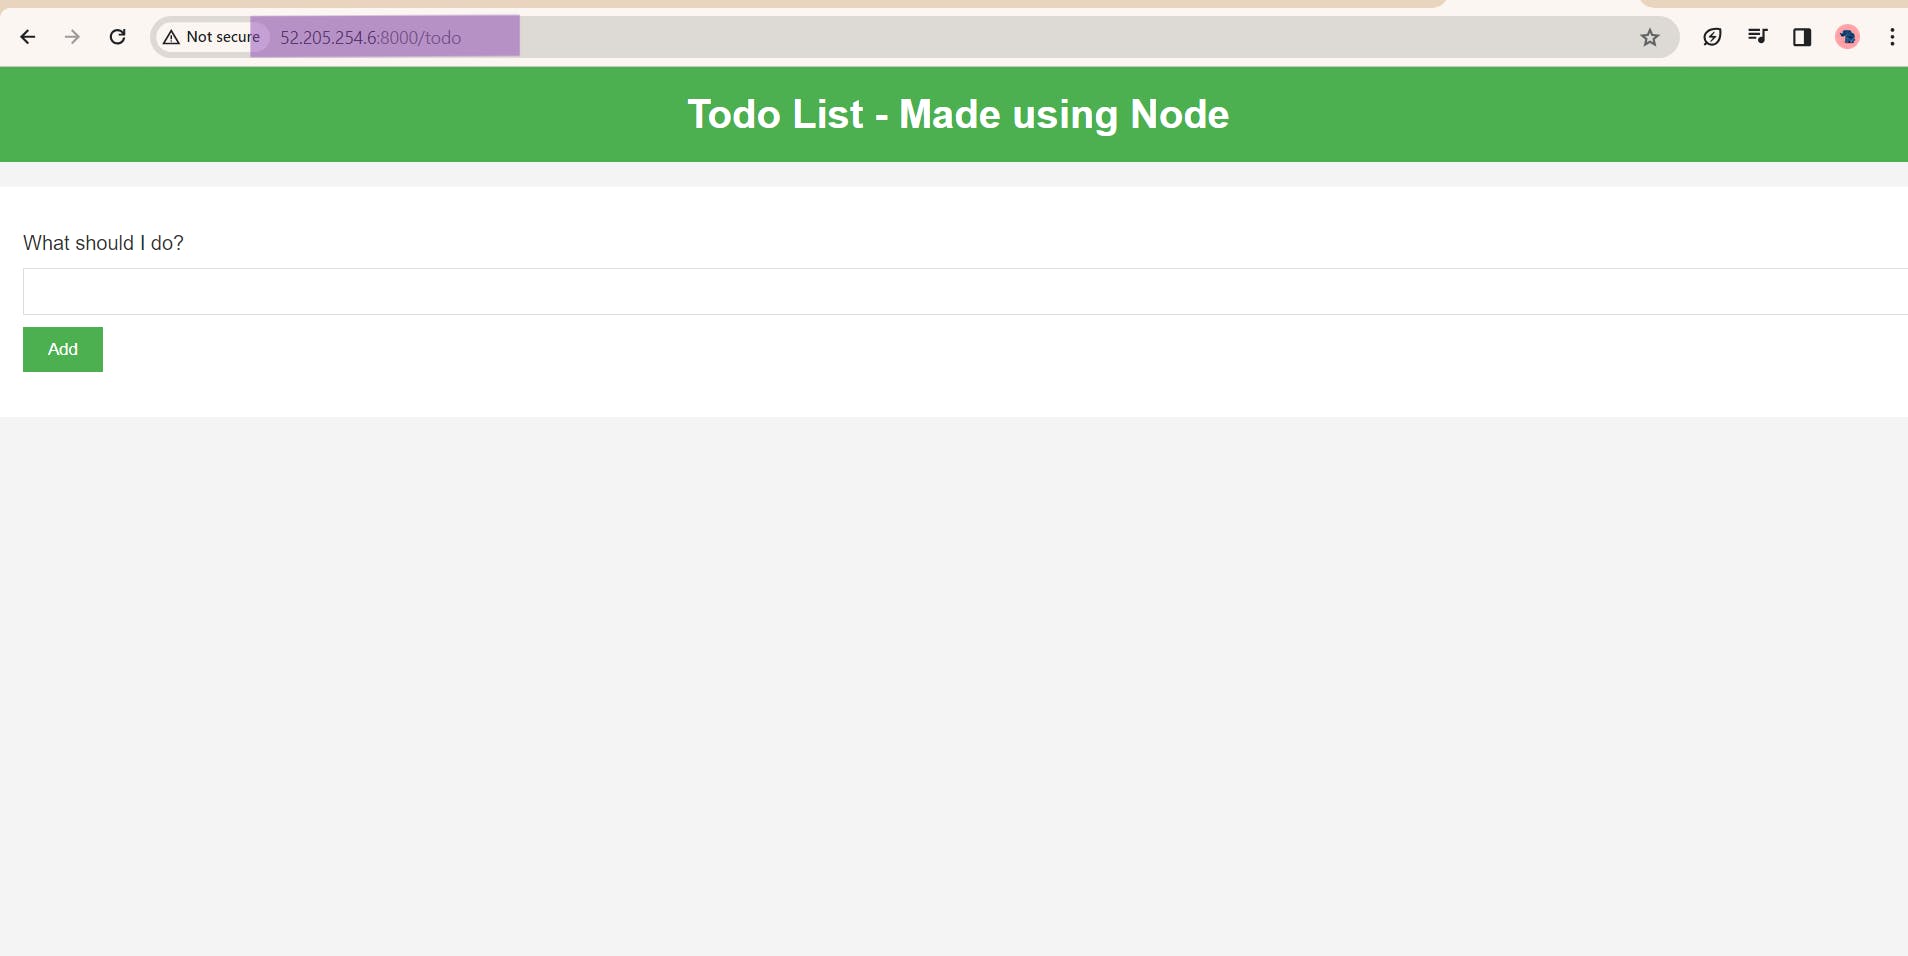
Hurray🙌🥳 !!! Successfully Deployed Node To-do App .
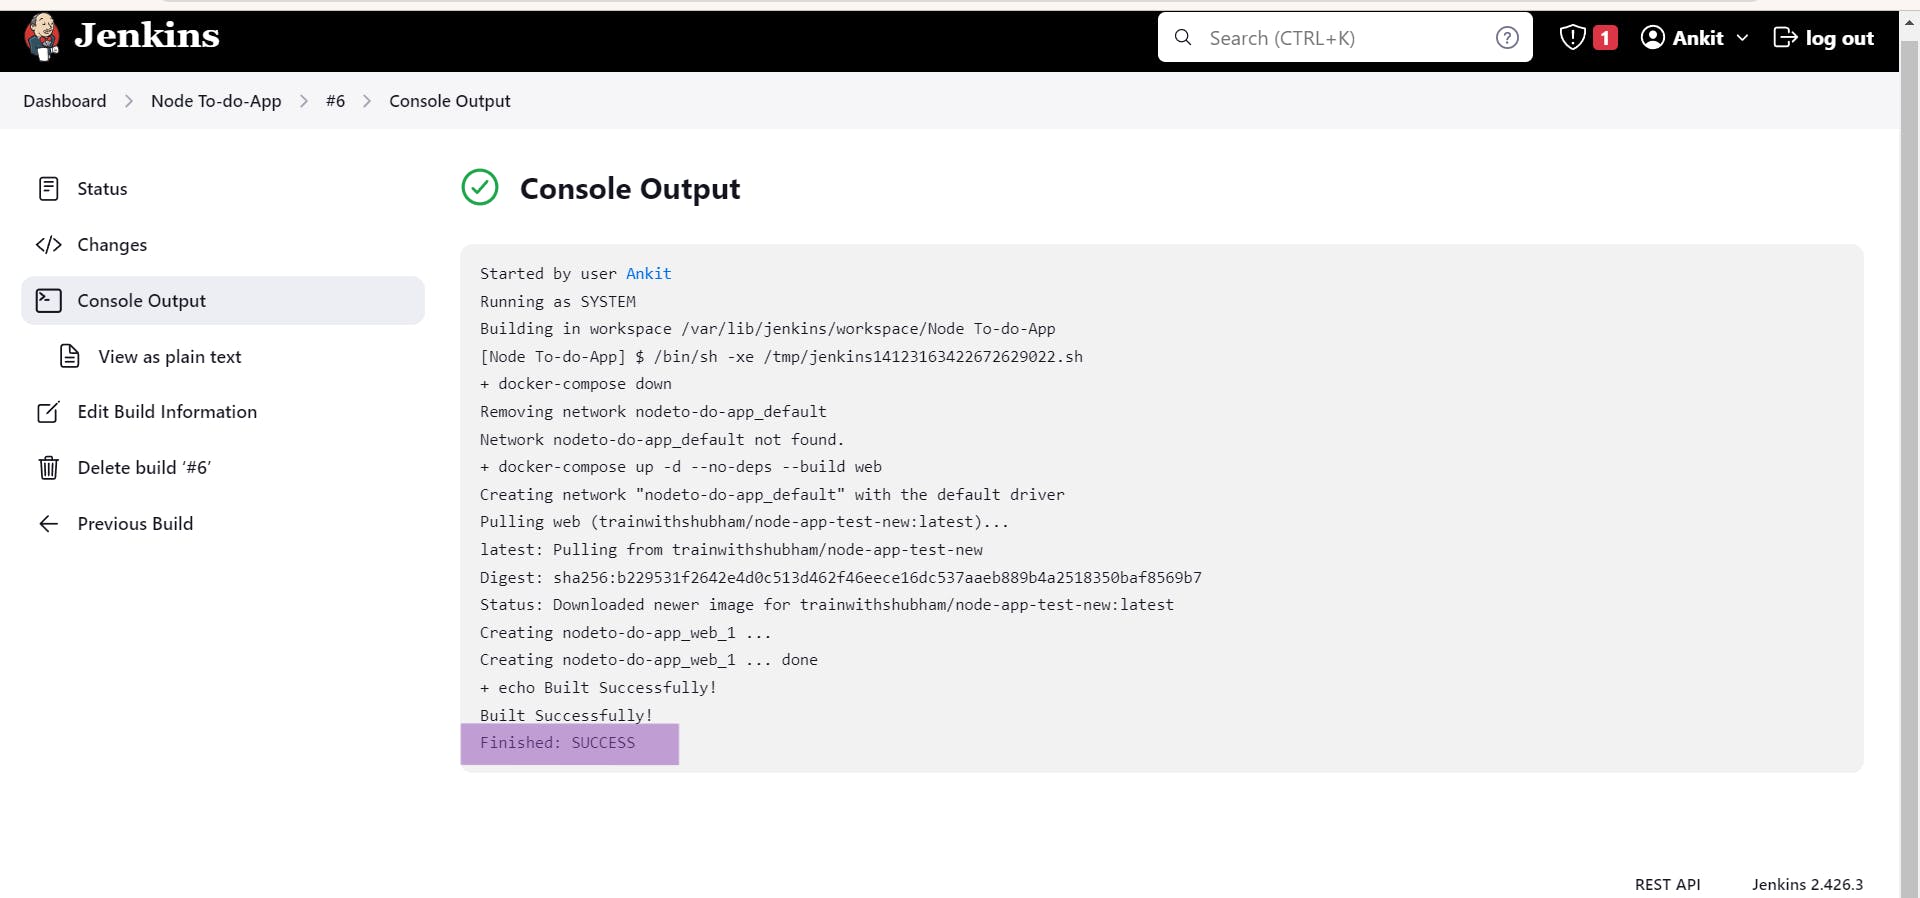
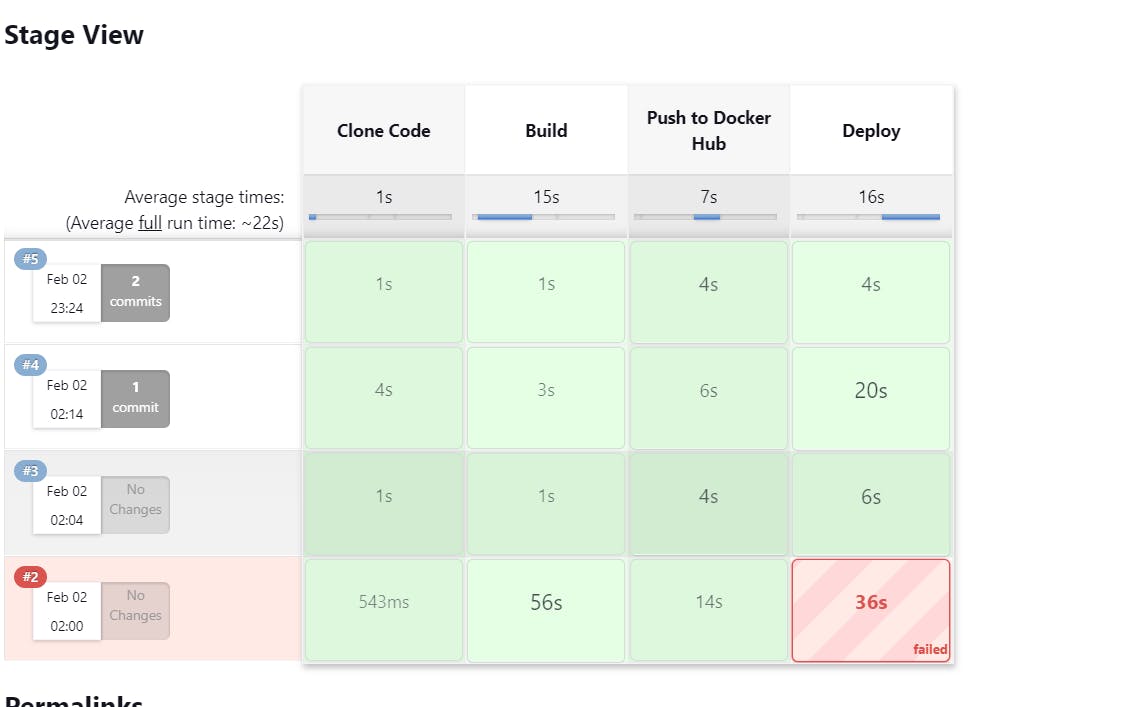
To check the Logs of Deployment :
Project name > Build Number #6 > Console Output
⚡CI/CD Project ⚡(Pipeline)
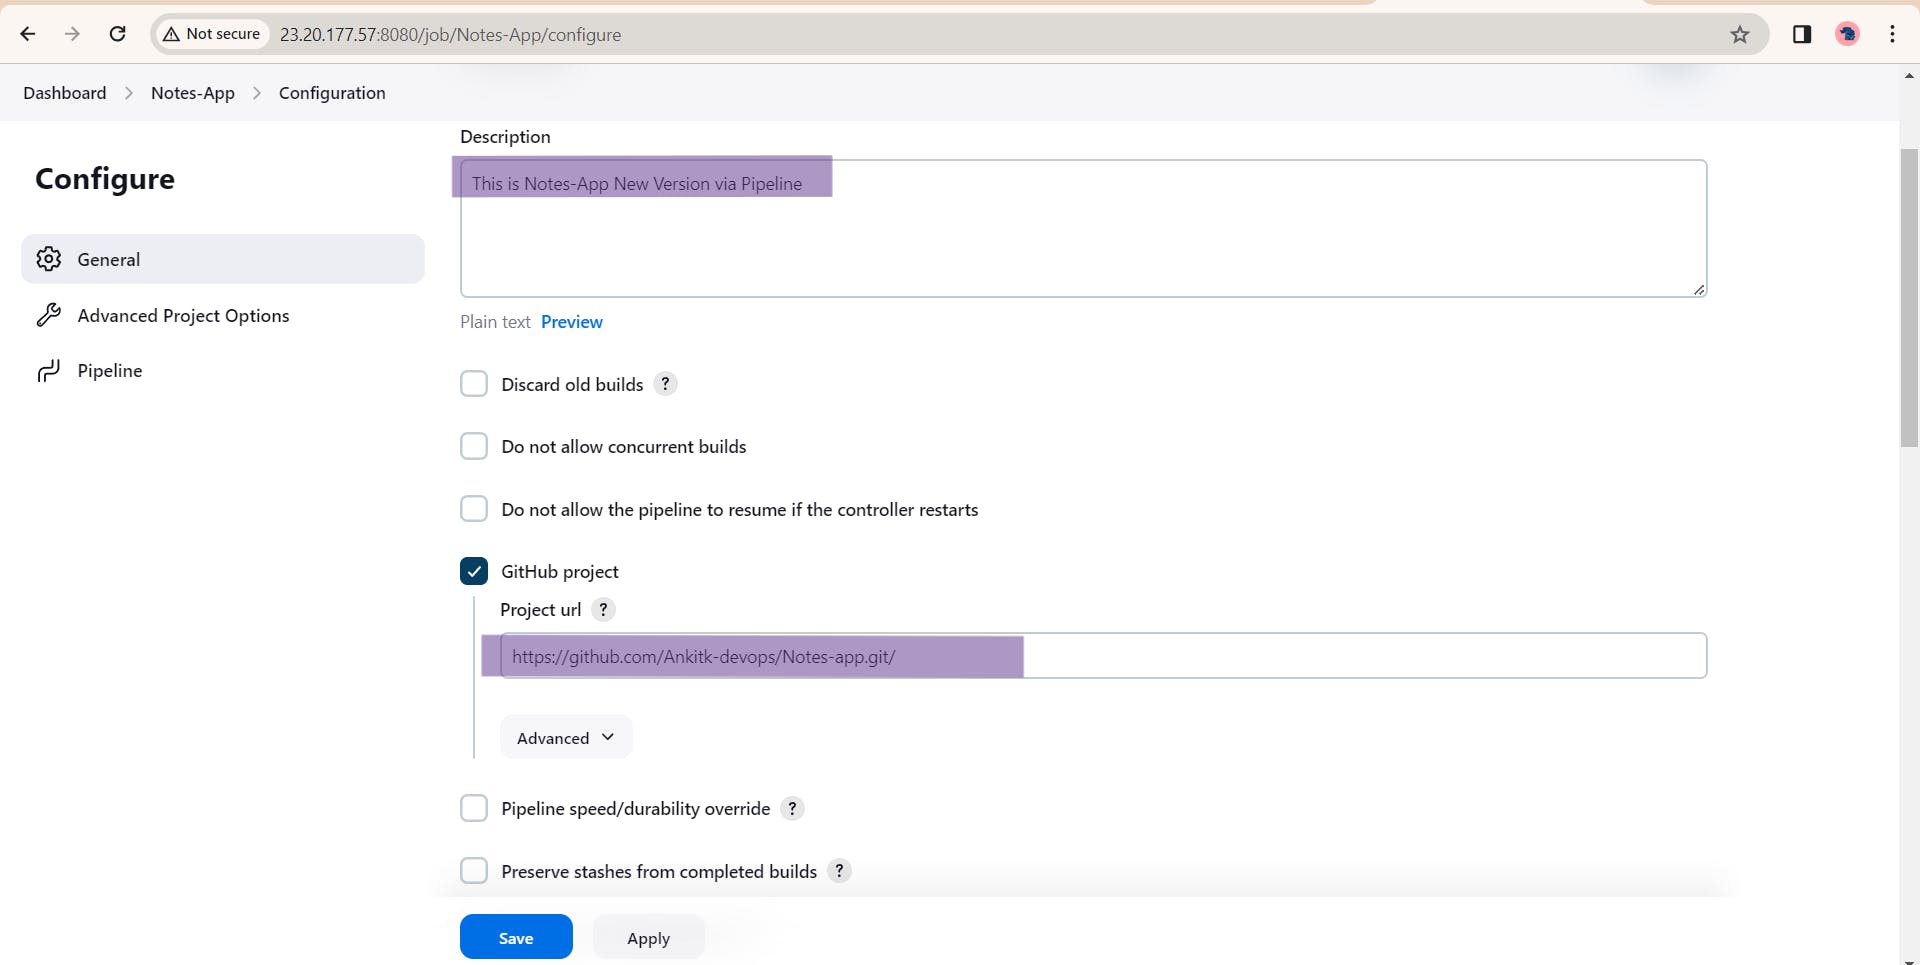
This time lets select Pipeline instead of Free-style project and add the following.
After that lets select Script in execute Shell and build the pipeline.
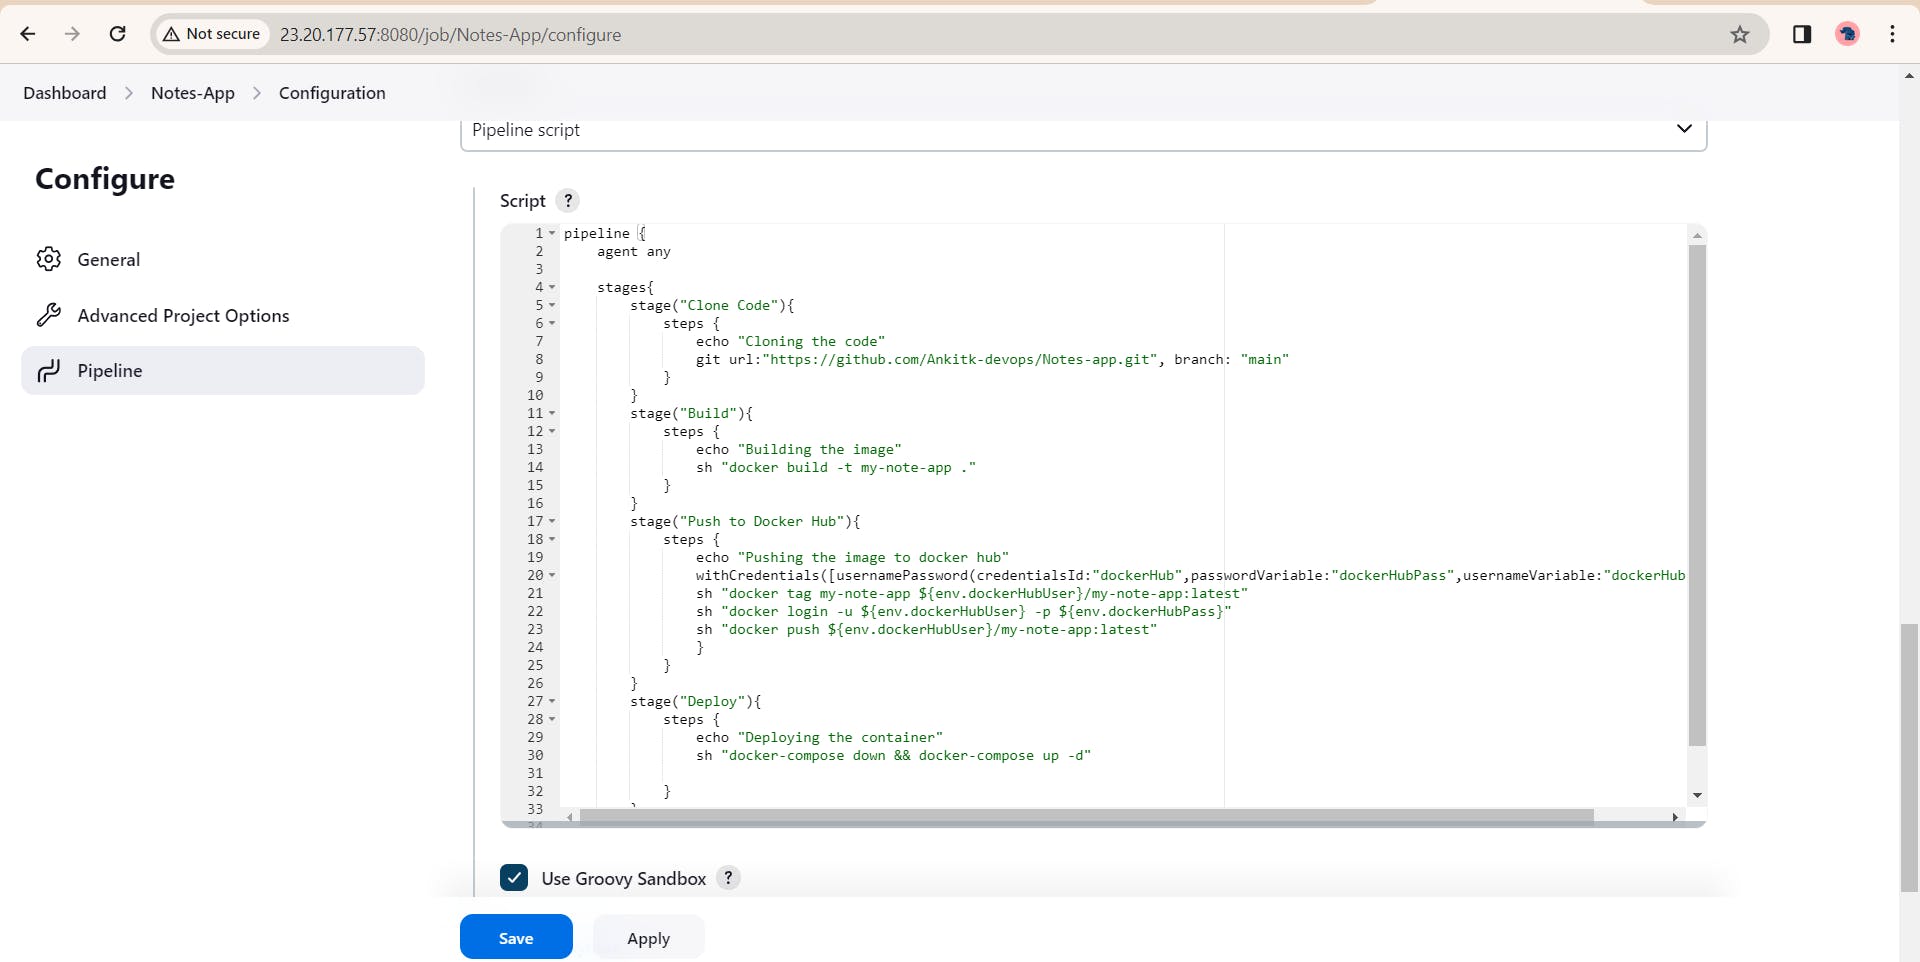
pipeline {
    agent any

    stages{
        stage("Clone Code"){
            steps {
                echo "Cloning the code"
                git url:"https://github.com/Ankitk-devops/Notes-app.git", branch: "main"
            }
        }
        stage("Build"){
            steps {
                echo "Building the image"
                sh "docker build -t my-note-app ."
            }
        }
        stage("Push to Docker Hub"){
            steps {
                echo "Pushing the image to docker hub"
                withCredentials([usernamePassword(credentialsId:"dockerHub",passwordVariable:"dockerHubPass",usernameVariable:"dockerHubUser")]){
                sh "docker tag my-note-app ${env.dockerHubUser}/my-note-app:latest"
                sh "docker login -u ${env.dockerHubUser} -p ${env.dockerHubPass}"
                sh "docker push ${env.dockerHubUser}/my-note-app:latest"
                }
            }
        }
        stage("Deploy"){
            steps {
                echo "Deploying the container"
                sh "docker-compose down && docker-compose up -d"

            }
        }
    }
}
This pipeline script with help building the pipeline, that we are aiming for. This script includes Docker Login so we will pass the credentials secretly through Id.
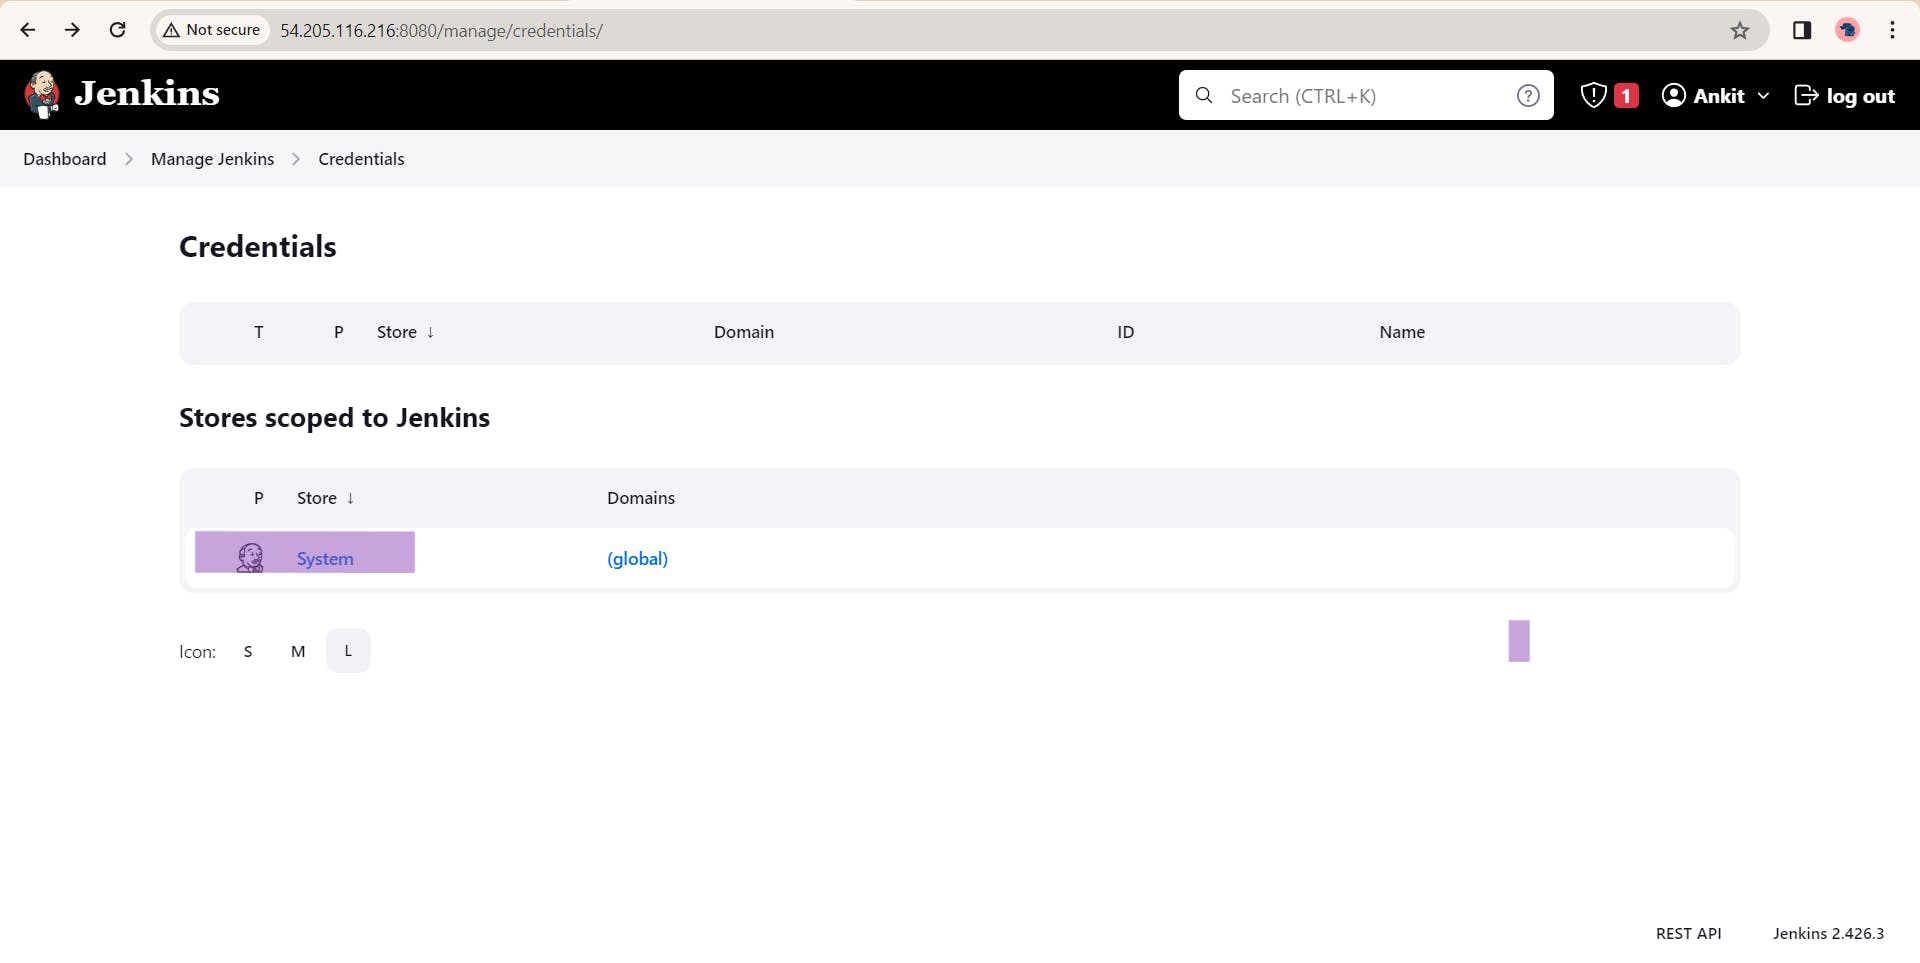
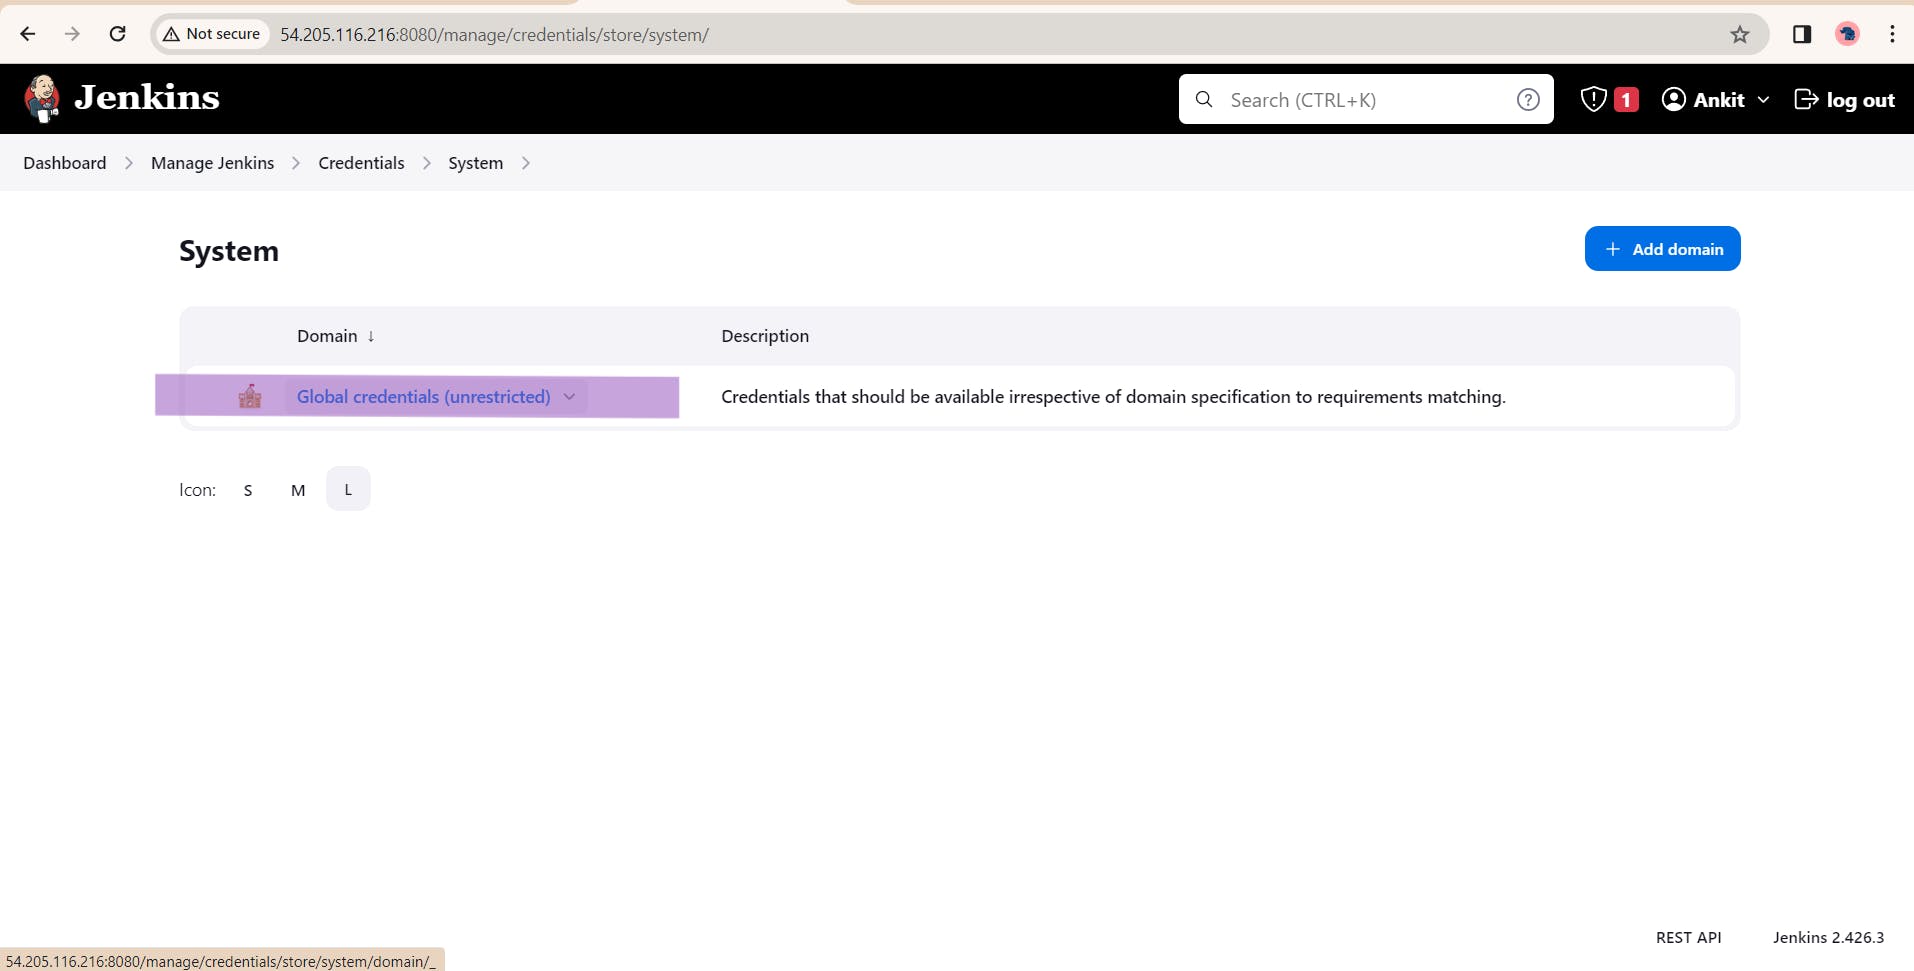
Creating Global Credentials
For creating Id we will do the following steps.
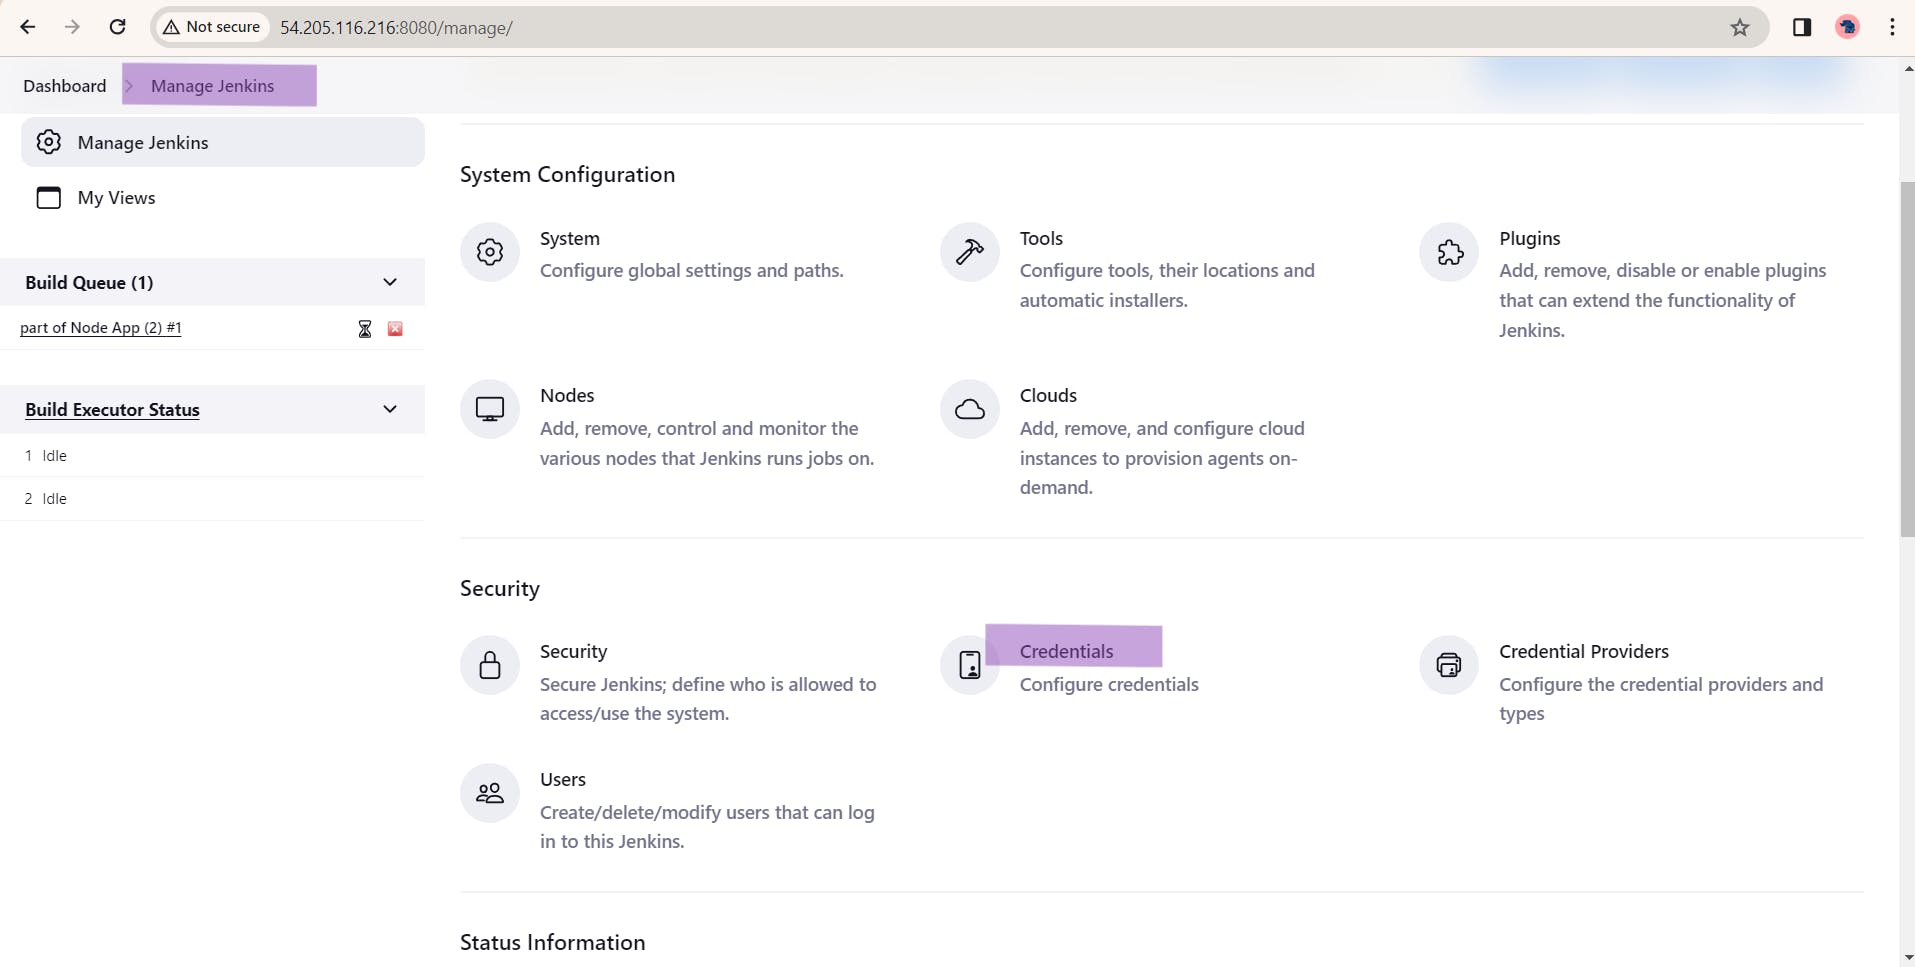
Manage Jenkins > Credentials > System > Global Credentials > (Add Details)
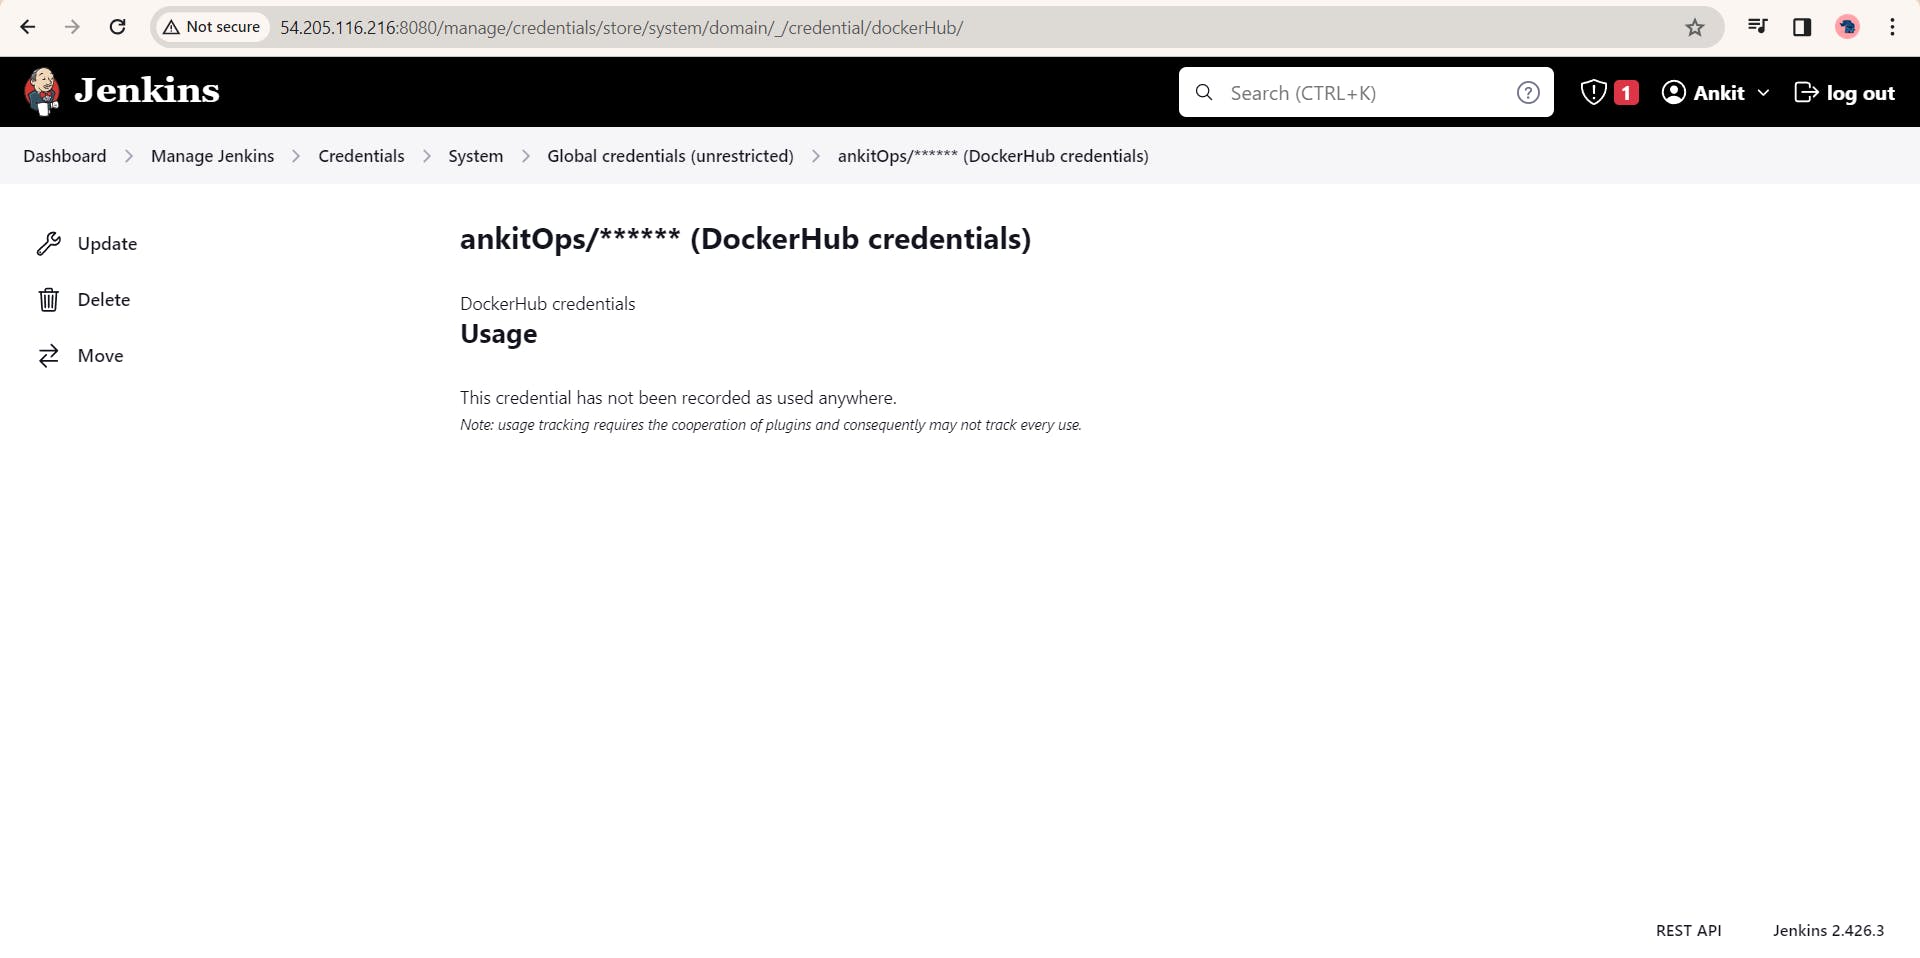
💡Tip : 1) The ID used here is case sensitive, name of the Id is dockerHub that we have used in the pipeline. So be careful and check twice before running the pipeline otherwise it will fail the pipeline.
Run this commands in Cli .
Run this commands prior to not face any issues related to group adding & others.
sudo usermod -aG jenkins docker
sudo usermod -aG docker jenkins& then reboot the system
sudo systemctl reboot
Open the port 8000 in the security group.
Login to Dockerhub , where we can the notes app pushed to docker hub.

After everything, when we hit on the Build button we will see the pipeline running and it is successfully built.
Same, paste the Public IP in the browser and add 8000 port number in the end.
Yupzzz!!! We have succesfully built a working pipeline which is running smooth. Now we'll make this Pipeline CI/CD Continous Integration Continous Deployment by adding a Webhook. So as soon as any changes are commited the Jenkins pipeline gets triggered and Builds the New pipeline automatically.
Adding Webhook
Go to the Repositry > Settings > Webhooks
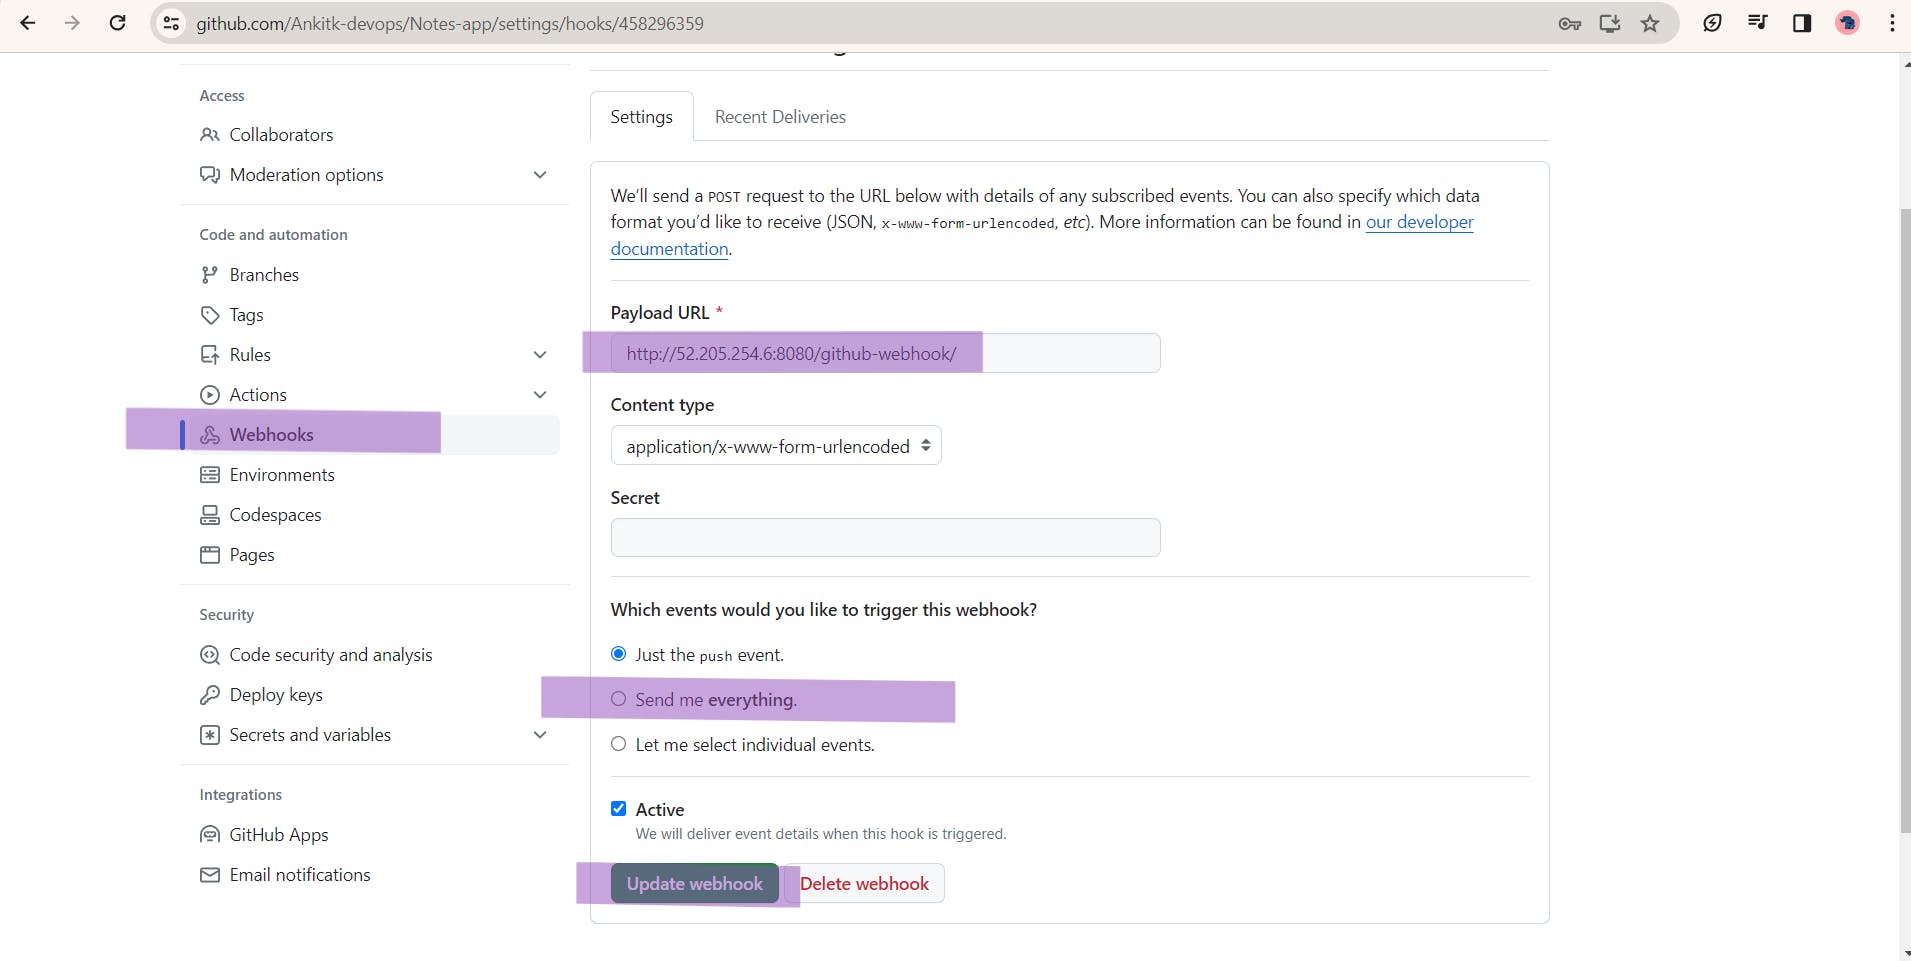
Add the url of of the Jenkins and add /githhub-webhook/ at the end
In events select Send me everything and create webhook.
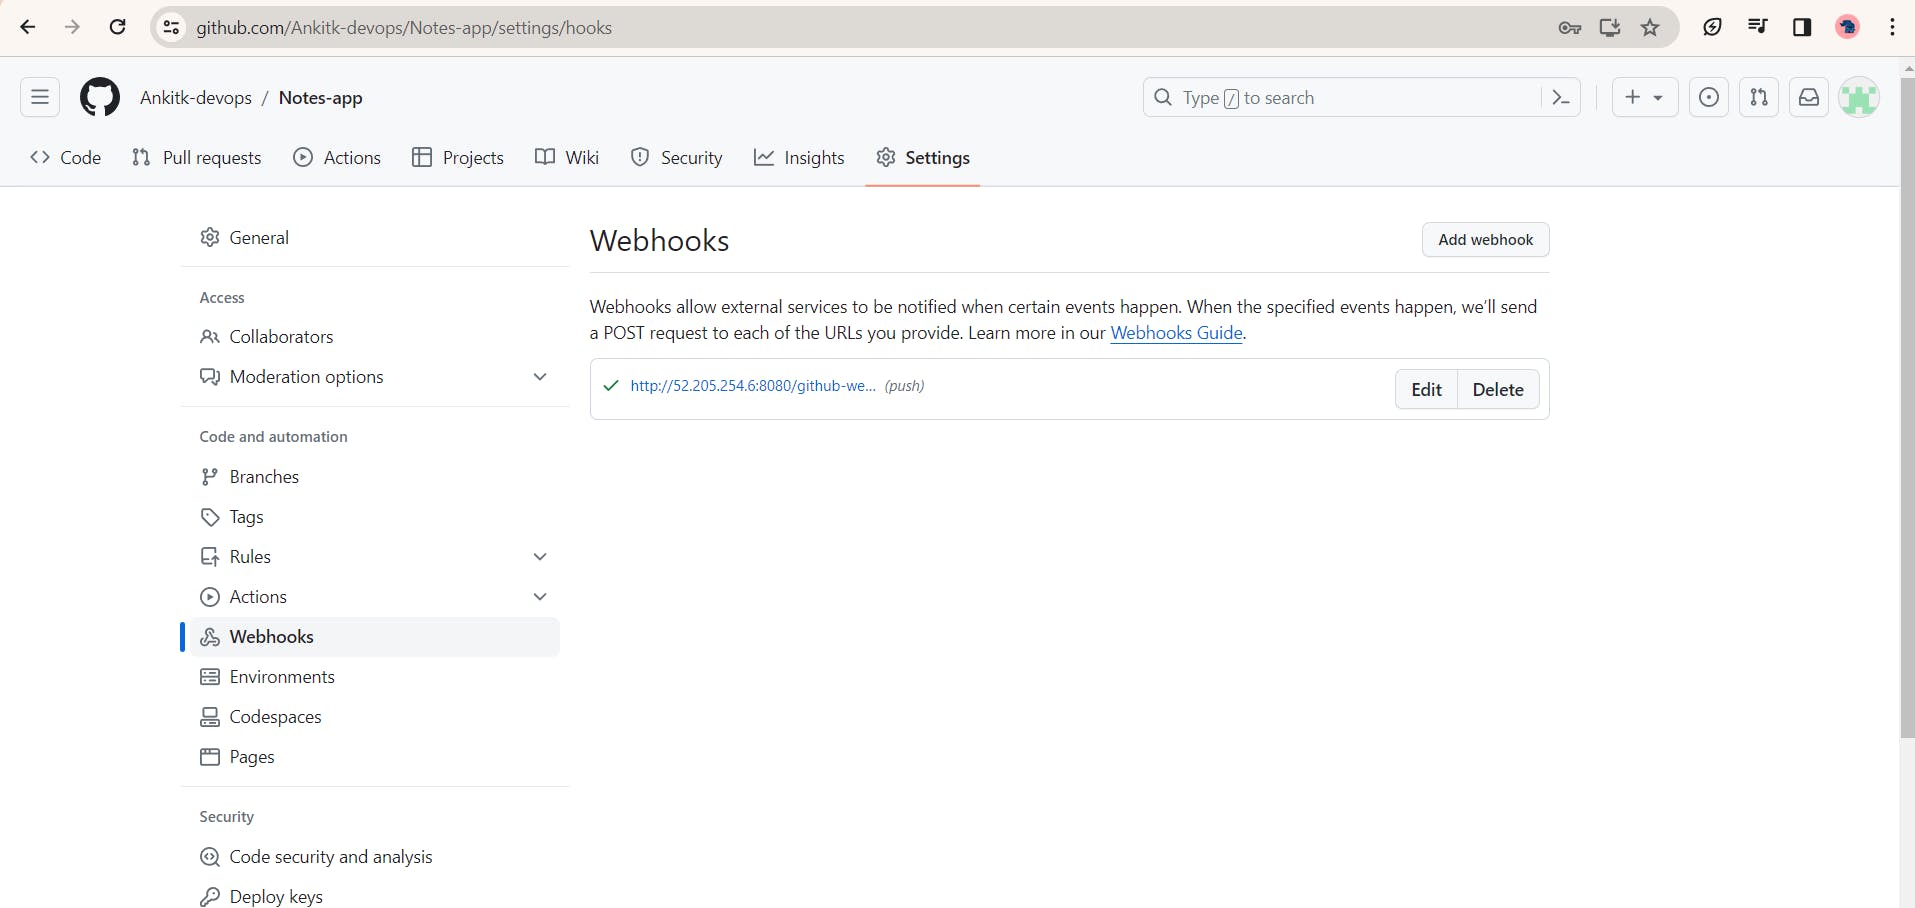
You will see the Green Tick once the Webhook is created.
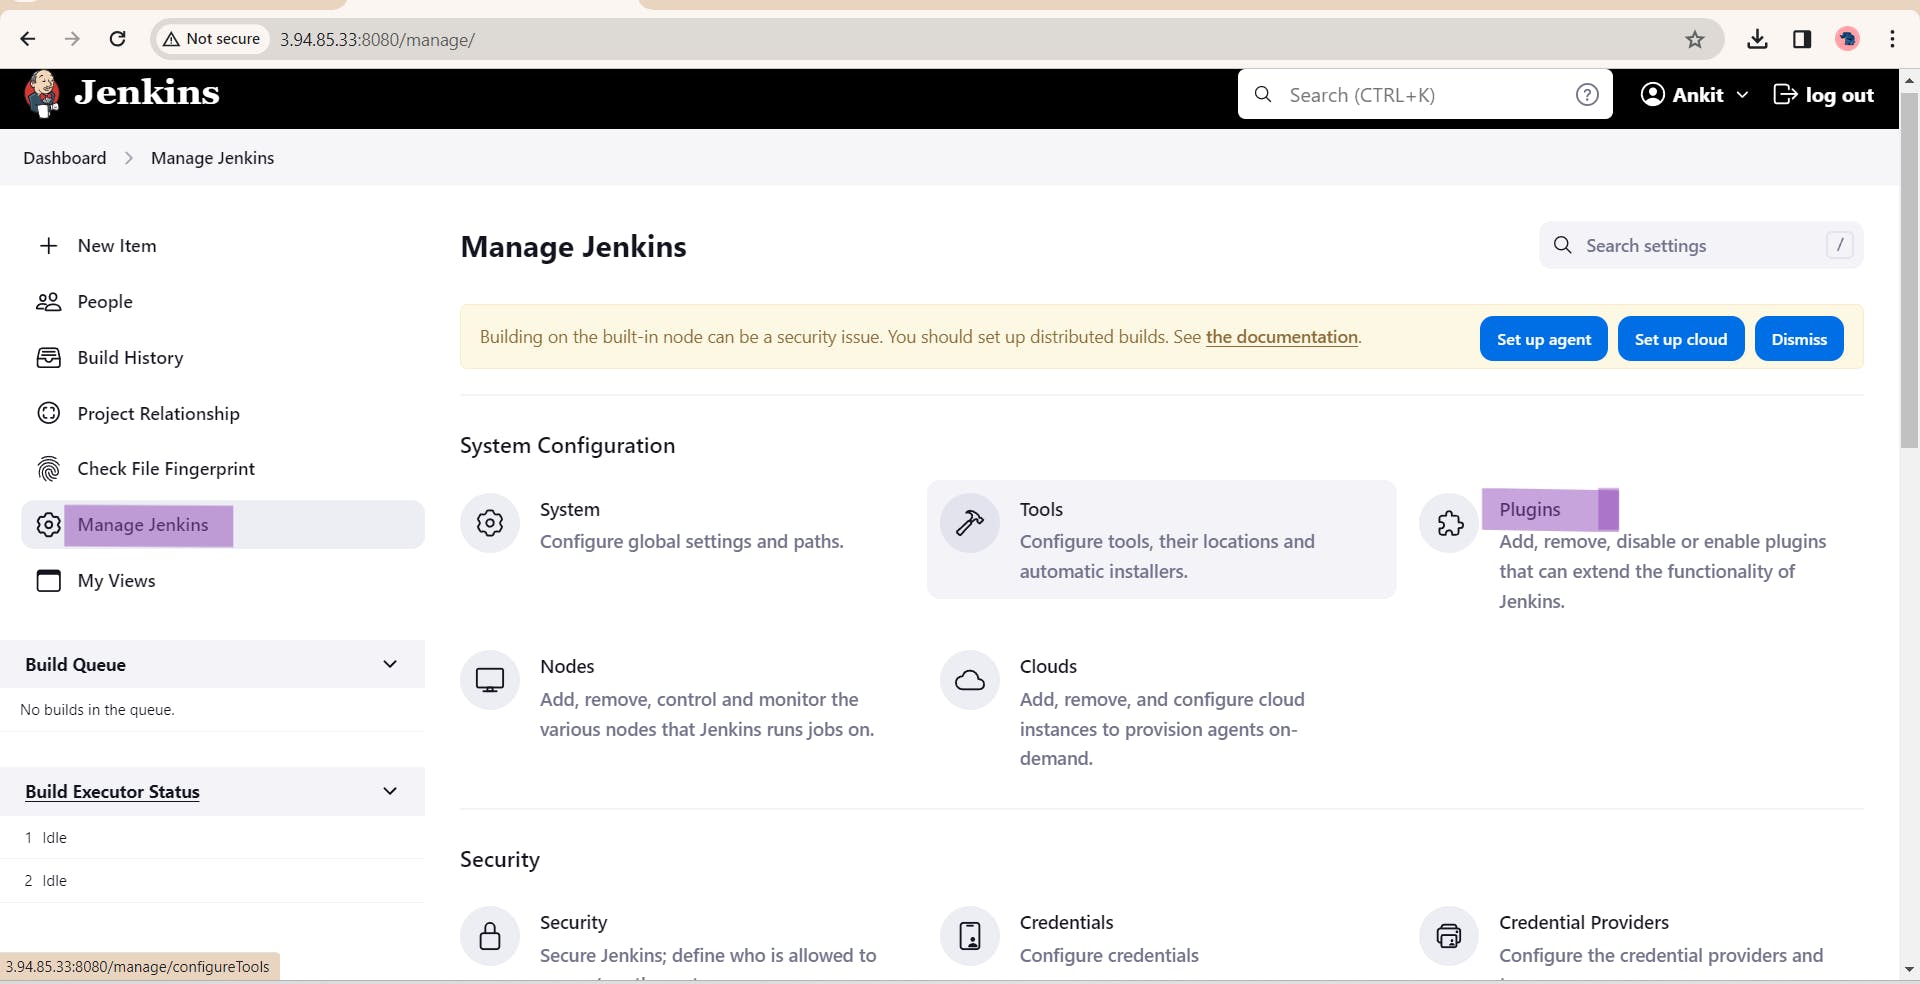
Plugins
Manages Jenkins > Plugins > Available Plugins > search for required plugins > Install
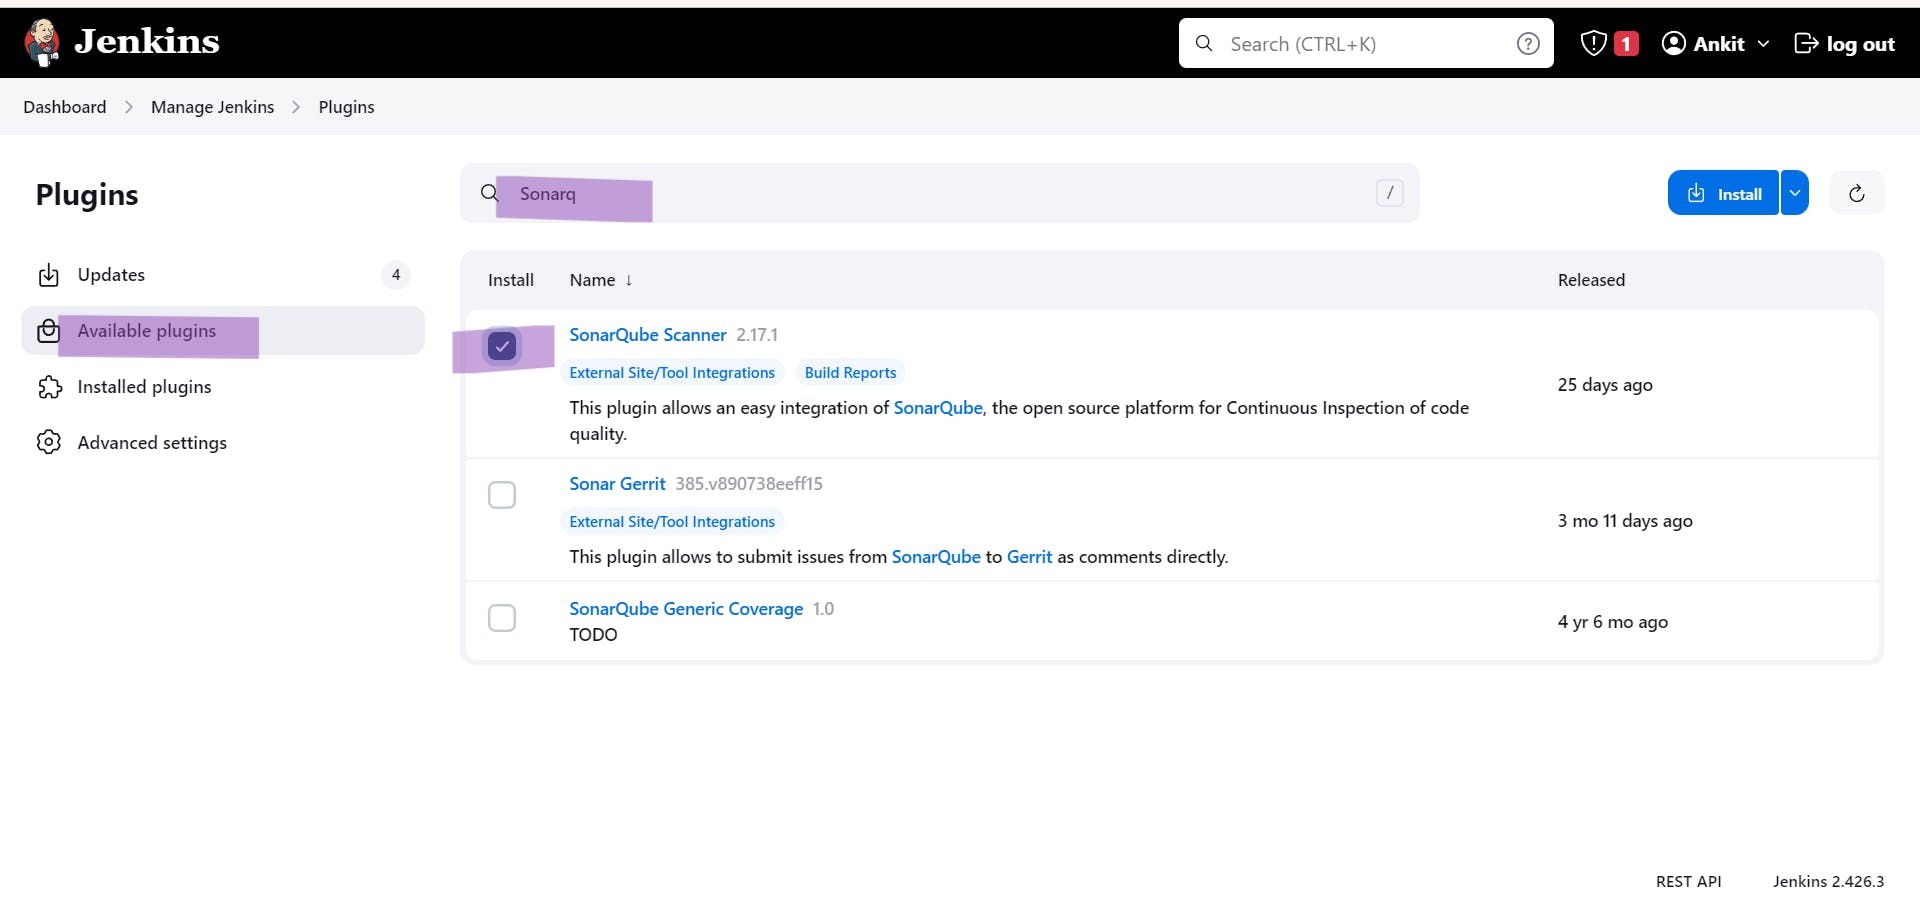
Some of the Plugins require Restart, so restart Jenkins and use it.
More Projects series on the way, Join on the Linkedin and Twitter to get more Updates. Thanks for reading !
Links for Github Repository:
2. Node To-do-App (Shubham Londhe)